For a bit on who and what these are for, check out this
previous post. Most of this project was completed last week. Today I've done Step 9, which is about all I can fit in after a rough night, a sleep in and a trip to the beach with a baby :)
These are the instructions to make one photo cube. I haven't said "buy 20cm of 150cm fabric" although that's what you could do for each, because I think this is a good project for scraps. The squares could even be quilted if you like.
Need
- Vinyl, or some kind of transparent sewable plastic - four rectangles of 10 x 14cm
- Three different fabrics - preferably cotton/non-stretch - two 17cm squares of each cut with the grain
- One foam 15cm cube
- Two strips of ribbon or bias strip - 10cm long at least
- Sewing machine
- Needle and thread
All seams are sewn with a 1cm seam allowance. Overlocking the seams is fine, if you like to do your crossword puzzles in pen.
I'll describe how I did mine, which includes attention to the direction of photo pockets, directional patterns and loop placement.
1. Cut out all your parts
2. Organise your sewing.
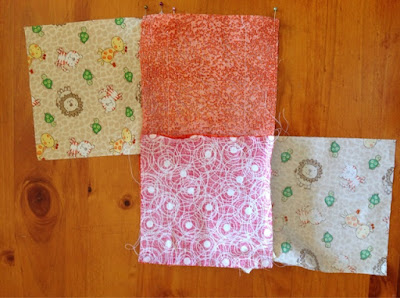
Layout your cube like a net for a 3D shape and organise the direction of photo pockets and patterns. I've orientated the photo pockets all the same way. For me, the top and bottom panels have feature patterns that have pictures, as you an seem from both examples. When I have fabric with directional patterns I've alternated which way they go. Here's an example:
 |
| Net layout with loops at their corners, directional patterns alternating, photo panels aligned |
3. Make up your photo pocket sides.
Centre a vinyl piece on a square and pin in place. Pin in line with the sewing line, which is as close to the edge as you're comfortable.
The pinning is important: my old Bernina minimatic fed the fabric quicker than the vinyl so I needed to be quite assertive when feeding both pieces through. I would use a walking foot if I had one. The pinning helped to keep it where it should be. Some of the stitching became a bit crooked, and the feeding pulled unevenly, but the shape of the cube pulls everything square enough.
Also, I couldn't get the thread tension right without the fabric being interfaced, but decided it wasn't that important if it held and looked OK.
 |
| Three and a bit edges sewn |
Sew three edges completely (which ever three you like) and on the fourth edge, sew about three stitches and reverse stitch back to the corner. This helps hold the photo in the pocket and secures your stitching.
4. Pin the loops in place.
Lay your photo pockets back in your arrangement and place the loops. The loops will end up on opposite corners if you pin like this: on the first and third square (or 2nd and 4th, whichever) pin the loops to the right edge of both, the bottom right for one and the top right for the other.The pic at step 2 shows this better.
 |
| Planning the loop by using another object. Green pin is sewing line. |
I recommend planning your loops by using another object to mark the sew line. Here I've used a cube I've already made because I can pin the ribbon to the object. They're arranged so that the loop lays against the third seam at that corner when folded down. The edges of the ribbon won't lay flush with the fabric edge; they'll tilt a
little towards the corner. It doesn't matter how far or near they are to the corner - it's up to you.
 |
| Pinned loop - flat view |
 |
| Loop pinned to corner - closer! |
 |
| Loop laying down on third seam |
4. Sew the side panels into a row.
Make sure you catch the loops when necessary. Here is how I pinned and sewed mine.
 |
| Panels arranged for pinning, right sides down |
5. Attach the top and bottom panels.
Sew one side each of the top and bottom panels to the side panels. I recommend sewing the edges that includes the other end of the loops so that they're machine sewn.
 |
| Top panel sewn to catch loops |
6. Sew last side seam.
 |
| Top and bottom panels sewn. Sides panel seam is pinned (at top) for sewing. |
7. Sew one end completely.
This step takes careful pinning.
Your sewing needs to stop at the seam allowance at each junction. Otherwise, when the cube cover is turned out, the fabric is pulled awkwardly and the corners will buckle and look odd.
Pin your fifth panel so that the seam allowances are folded back and sew as close to the cornerpoint as possible, lowering the needle and pivot turning at both ends.
 |
| Pinning of top/bottom panel from beneath |

| Pinning of top/bottom panel - one edge |
| Top/bottom panel corner sewing completed |
 |
| Ready for turning out |
7. Turn out and check your work!
8. Baste the edges of your final panel.
9. Mark the seam allowance on the side panels in some way.
You may choose to press them before inserting the cube, tack a line, or use a marker that can be brushed off later or sewn out of sight.
I chose to sew a long stitch around the edge using the 1cm allowance guide, but with the needle shifted to the right (about 2mm).
 |
| Basting on last panel and seam allowances marked |


No comments:
Post a Comment