Showing posts with label knit. Show all posts

Nov 12, 2013

D203-7: Secret Purse!

A wonderful friend of mine is getting married soon.  She's so wonderful she reads all my blog posts, even with the crappy photography.  So, while I've been preparing a gift for her I haven't wanted to reveal it here*. On Sunday night, however, it was completed and now that I've been able to hand it over all can be revealed.

Both sides of the purse


The clasp and ribbon

Well, not quite all.  I didn't take photos as I was going, but if you hold you hand over part of the pictures you'll get the same effect.

This friend has carefully and diligently made beaded purses for her friends during their engagements, so I've been looking forward to returning the favour.  Once I knew she was having bridesmaid dresses with a rose pattern I had my heart set on echoing that in this purse.  I'm not sure it was the most sensible decision.  I feel the last beaded purse I made was smoother, maybe more elegant.  It was certainly much quicker, with the purse's shape being built by simply sliding more beads as you went down the purse rows, while knitting the same number of stitches.  Maybe I should've just done another of those...

I am frustrated with the few loose rows. They were hard to detect while I worked and it took me half a side to get my groove, I think.  I kind of hate that this precious gift is not as even as I'd like.  Time was not on my side, however, so redoing parts was limited to only the frame being resewn, and only once I knew I had time.

I recommend keeping a set of pliers on hand when knitting beaded purses.  Use the pliers to break and remove any beads that are thinner than usual.  There will certainly be enough beads to cope with culling the irregular ones.
This was a step I did with the first purse and it was worthwhile for a design that used so much repetition, where unevenness is easily spotted.  In this design it makes for a bead that flips it's direction more easily than the rest.  While the regularly sized beads all sit in the same direction, the thin ones flip from side to side.  If you're feeling particular, get rid of the thin ones as you go and you won't feel the need to (uselessly) fiddle with their arrangement later.

The ribbon is secured with little beaded stars
Before I started I had a choice of beads and thread colours (the other set shall be used for another's wedding - my friend has kicked off the tradition in me too!) and a few patterns to choose from.  I even considered getting enough beads to do this pattern in reverse, with the blank parts being beaded and the beaded stitches being plain.  I thought it might build a cleaner picture of the roses however, having never done this pattern before, I thought it prudent to stick to the instructions.

I am glad to have chosen a larger purse too; I want my friend to be able to use it for lipstick, tissues and an atomiser should she want to.  Or for some other thing like, oh I dunno, storing her silk stockings ;)

One thing I have hesitated to share here is the big mistake I made.  It may be hard to see at first, but it is so very clear once you see it.

I was fairly pleased with the letters, as much as they could be done on such a small scale.  I spent some time, too, considering the symmetry and balance of the initials. (See it yet?)  I share an initial with the groom, so we were even able to make jokes about how the purse is about my friend and I - a ha ha!
So I was a bit miffed, to put it mildly, when I realised that I hadn't thought how the reverse knitting of the pattern (while fairly inconsequential for flowers) would change the letters.  True story.

At the start I was glad to have symmetrical letters because they were easy to plan.  But now I wish there's been an E or something so I could've seen it happening before I was finished! Ugh! Amateur lament!

Glitches and dumbfoolery aside, I do think it looks quite vintage and pretty (naive at the very least).  I hope my dear friend has a use for it in the future.
All my best wishes!

*I'm writing the post before having given the present. I won't be the least bit surprised if she's already figured out what it is!

Oct 3, 2013

Pattern: Linen-stitch Kimono Booties

These booties are modelled on Chaussons mignons by Pruline (Ravelry link).  They should fit an 11cm foot, which is 9-months-old for my small baby.
You may make the sole as long as needed for your baby and, at the sides, cast on about 3 stitches for every cm of sole.


Linen stitch kimono booties

A tunnel shank button
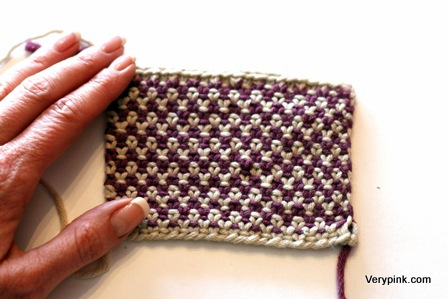
Linen stitch is a woven stockingette stitch. The weaving is formed by slipping every other stitch with the yarn in front of the work. It is usually done with a two-row phrase of slipping every second stitch in one row and every first stitch in the other.

Needs

  • Two small buttons, preferably tunnel shank
  • About 80cm of matching thin elastic. 
  • 3.75mm needles
  • 50g Aran yarn (10ply). The example uses Debbie Bliss Aran Cashmerino in grey (colour way 28).

Tension

12st x 43rows = 4cm

Abbreviations 

CO = cast on
K = knit
P = purl
sl1p = slip 1 purlwise
st = stitches
yb = take yarn to the back of the work (away from you)
yf = bring yarn to the front of the work, between you and the work.

Bootie body 

Sole

CO 15 st (leave a long tail for construction)
Row 1: *P1, yb, sl1p, yf* - repeat ** to last stitch, P1
Row 2: K2, *yf, sl1p, yb, k1* - repeat ** to last stitch, K1
Repeat these rows (linen-stitch) till work measures 10cm (4" - approx 42 rows), finish with a knit row.

Sides

Next row: turn, extend work by CO 30 st purl wise. Do not turn - work these stitches as normal as follows: P1, * yb, sl1p, yf, P1* - repeat ** to end.(45 sts)
Next row: turn, CO 30 st knit wise, then, without turning, work these stitches as normal as follows: K1, *K1, yf, sl1p, yb,*, repeat ** to last two stitches, K2 (75 sts)
Continue in linen stitch until new section measures 5cm (2" - approx. 25 rows) (or as long as your original cast on is wide). 
Finish with a knit row and cast off as follows:
P1, *yb, sl1p, pass first stitch over slipped stitch to cast-off 1, yf, P1, cast off 1* - repeat ** to end.
Bind off with a long tail for construction. 

To make up:

Hold your work so it looks like a T, purl stitches facing up (linen pattern down). The up-down part is the sole, with a bar across the top being the back and sides. The instructions describe making up each bootie as though it's facing you, with the toe pointing towards you and the heel away.

Baby's Left bootie

Take the left arm of the bar and fold it so that its short edge matches the end edge of the stem (the toe). Fold the right arm over to sit on top of them. Match the length of the toe edge and the corners. Whip stitch from left to right (big toe to little toe) through the three layers, continuing down the right side. Whip stitch down the left side (from big toe to heel). 

Baby's Right bootie

Arrange as for the left bootie but overlap the bar arms left-over-right, stitching from right to left and down the left side, and then stitching the right side. 

Both booties

Count 18 stitches from the toe on the upper layer of the bootie and flag this stitch with a safety pin. Count 40 more stitches, along the back if the bootie, and flag this stitch too.
Take one end of your elastic and tie it to your button.  Use a yarn needle to thread the other end through the hem, beginning at the one marker and finishing at the other. The elastic in these booties is threaded through the edge for the first and last 8 stitches, but through the purl stitches below the edge around the heel, to pull the bootie up the back of the foot. 

Tie a knot where the elastic exits the hem. Make a loop, using about 1cm of elastic, by tying the end in a grannie knot behind this first knot. 

Thread the ends of the elastic into the inner sides using the purl loops inside the bootie.

Oct 1, 2013

D176: Neat feet

One of the great things, if not the great thing, about these booties is their simplicity.  It's a big T shape crossed over and sewn.  Badabing, that's it.  And as sweet as the symmetry is, feet just ain't symmetrical in the same way.  I mean they are symmetrical, just to each other and not in themselves.


Consequently, I've pitched these just a bit too small for Bub, and I think they'd work best on a foot about a centimeter shorter.  Which is no biggie, but there you go.  
Some excellent friends of ours had the good foresight to have their first girl about 364 days after ours, so all our handmedowns will be seasonally appropriate!  It may seem silly, but knowing their little girl may get some wear out of these come next June is enough to make it worthwhile for me! 

Here I am trying to get the placement of the elastic and button right.  I thought I'd centre it, initially, but the foot shape doesn't suit it so I'm trying to figure out which way and how much to adjust and create some balance.


I decided to thread elastic all the way around, rather than just on either side, or even using a yarn or elastic loop (too fiddly).  Green is not my first choice for button colour, but the set-in shank is.  I thought a regular eye-hole button would be awkward and bulky with the elastic and a regular long-shank button would be uncomfortable when crawling.

I'm currently trialling the elastic being threaded below the cuff at the back, to counterbalance the roominess in the corners.  Anyway, still a bit of remaining trial & error that bub hopefully has the patience for!

Pattern to come, hopefully soon!

Sep 8, 2013

D159-161: Slow goings

I know linen stitch is slow to work because of the weaving between rows, but for some reason I'm extra slow these days.  Maybe it's that Bub has been coming down with a cold, so by the time she's settled and things are done there's not much time left for knitting.  Anyway...

Here's how my experiment looks now:

Now, fingers crossed while I weigh this and hope what remains on the ball is at least as heavy, so that I can make two booties...

Nnnnope. What I've knitted is 18g, and what remains is 9g.  Booo!  
So, do I go buy more wool? (I was trying to use up these left-overs!) Or do I run with just doing a single bootie as a prototype? Ugh.

Sep 2, 2013

D156: Fathers' Day Fare

With a last minute message about a Fathers' Day arvo tea at my folks' I still managed to bake an Apple Cinnamon Teacake!


Bub slept on the way home (made complete liars out of us on that front, bless her socks) and I managed to get some more of my linen stitch idea worked out.

Aug 30, 2013

D155: Linen stitch wonderings

A bit of trial-&-error on the horizon; giving something new a bash... 


Aug 4, 2013

D137: Complete - Harrison's Shawl Collar Sweater

I finished the jumper for my lovely friend's gorgeous baby.  Unfortunately I have a cold this weekend.  It hasn't hit me very hard but I've no intention of inflicting it on my friends and their children (who knows what it might morph into for them) so at home I shall stay.

I'm sure the colour on these is off.  The decorative yarn is a light blue and the main yarn is a lovely warm charcoal.

Imagine a slighter lighter blue than the border...


D135&136: Construction & notes - A Shawl Collar Sweater

Yup.  I'm not particularly experienced in knitted garment construction, so was a bit lost on the skeletal instructions provided in the book.  Here are some notes on the different parts about what I did and the results.  For tl;dr go the blue text.

Since this gift should be being delivered right now (brain is calling you Hub - give the gift! Give the gift!)  I can reveal all and use proper pictures.

Pattern: Shawl Collar Sweater
Source: Debbie Bliss Essential Baby
Yarn: Debbie Bliss Chashmerino Aran in charcoal (decorated with leftover DB Baby Cashmerino in Light Blue)

Body neck edge


I was worried about the neatness of this area.  I used a slip-stitch edging to create a smooth edge on the neckline of the body front.  You can see in the images below that one of the edges is a smooth knit-style pattern, which is the slip-stitch edging. 

For a slip-stitch edge, knit the last stitch of the row and slip the first stitch of the next row.  It will create one 'knit' stitch for every two rows and does not affect the row tension.

I left long tails when casting on or off near the shoulders.  I used one of these to sew the neck on the right side as well as back & forth across the neck front.

Shawl collar - Side seam


Below are two angles of the same work - sewing the right-side neck edge to the shawl collar.  To manage the ease, I pinned and held the shawl collar and neck edge and stretched them while I worked.

I used a whip stitch and picked up two 'beads' of the slipped stitch from the neck and whichever shawl collar stitch matched it best, while under tension.

Picking up the slip-stitch from the neck edge to whip-stitch it to the shawl collar.
Same again from another angle

My goal was to ensure a neat and pleasing line on the front, which was a little tricky with the decreased rows.

The inside of the shawl collar side seam - whip stitching.
The outside of the shawl collar side seam.

Shawl Collar - Front seam


The pattern says to place the right collar in front of the left.  I chose to attach them one at a time rather than sew through three thicknesses.

On the body front edge, there's a little purl bump behind each bound-off stitch.  They sit at the back of the work and I used this purl row of stitches when attaching the left collar edge.

Picking up the purl bump behind the cast off edge.

To attach the left (rear) edge, I pinned the point of the collar of the opposite corner and stretched them gently to match the lengths.   I began at the pinned end and whip-stitched towards the left side.

The left collar edge whip-stitched to the body front.  Note the row of cast-off stitches in front.

To attach the right edge, I pinned its corner to the opposite side stretching the lengths even and I whip-stitched the collar edge to the upper 'bead' of each cast-off stitch. I did this for two reasons:
  1. I felt this way would create the least bulk and was most likely to provide a flat seam. 
  2. I liked the idea of the lower bead creating a border that was consistent and neat. 

Whip stitching the right collar edge to the front using the upper bead of the bind-off row.
Note the lower bead is exposed. I like how that pattern leads from a rib in the front all the way to the right.
The completed shawl collar

Shoulder seams


The book's directions describe how to join bound-off and selvage edges (p.33), which is what's required when joining the bound off sleeve to the shoulder's selvage.

The length of the sleeve that's joined to the body goes a few stitches beyond the bound-off edge on both sides.  I aimed to get the corners of the sleeves into the corners of the bound off rows.

To manage the ease into the shoulder, I skipped every fourth stitch (a purl) from the sleeve. The skipped stitch was always a purl stitch because it tucked into the seam better than a knit stitch.


Sewing the sleeve to the body.

Sleeve and side seams


The side seams were the easiest to sew because they matched and have no increasing or decreasing.  Conversely, the sleeves were hardest because of their irregular edges.  I have no advice here - just do your best to match up the changes on each side! :)

Cuff seams


The cuffs on this garment are turned out.  I've written before about being aware of this during knitting.  When sewing the cuff seams, you must work on the opposite side for any seam that will be turned out.

I recommend giving yourself a long tail when casting on the cuffs.  This can be used to neatly join the seam and you can easily hide the end near the elbow, or wherever if goes.


So there are my tips for constructing this garment!  I hope they have been helpful.  :D

Jul 31, 2013

D134: Risotto for Bambino

Today I experimented with an idea I've had for a while - chicken & corn risotto for Bub.

Here is the prototype recipe I did tonight:

1 can of creamed carm (310g)
1 small can of corn kernels (optional)
300g minced chicken
1/2 cup arborio rice

1. With a bit of oil in a medium saucepan, fry the chicken and break it up as much as possible.
2. Add the corn and rice.  Stir until all the rice is wet.
3. Add the creamed corn and combine. Stir until it's reduced a little.
4. Add about a quarter cup of water and stir. Continue adding water and stirring until the rice is cooked. 
5. Blend or process to a consistency your baby prefers (or not).

Variations
Use chicken stock instead of water
Add chopped omelette* or peas at the end
Begin by frying an onion

I've found chicken stock to be quite salty and a very strong flavour for Bub.  Although I bought salt reduced stock for this meal, I decided to skip it and go conservatively for a new dish.

Another variation I'm considering is to fry the rice a bit first, add at least half a cup or so of water and then corn, and then the chicken.  Cooking the minced chicken in water would break it up more finely, I think, and make it less chewy for Bub.  The creamed corn would go in as the second batch of water.

I don't yet know whether Bub will take to this one, so cannot report any success.  She likes chicken by itself but hasn't had corn before.  We'll see after a week or so I suppose.

In other news, I've completed the parts of the Baby gift I'm knitting and have begun the decorating.  I'm choosing to decorate it while it's flat, rather than once assembled, as I think it'll be a bit easier that way. Especially if I make mistakes or make changes.

*If I were to add egg it would make it a very fowl dish indeed - the chicken, its food and its egg!  I should call it Chicken Coup Goop.

-----
Next day update:  Bub says nnnnope. But, you know, I've got about 20 tbp of this so don't worry Bub THERE'S TIME.

Fortnight later update:  A few days ago Bub ate two cubes of this - about 3 tbp!  I've been giving it to her for lunch and, at half way through the batch, I've eaten most of it myself.  However, these last few days have been a success and she's getting some good food into her!  Hurrah!

Jul 29, 2013

D133: Not quite...

With only the collar of this garment to go, here's what I had left after finishing all the other pieces...

The gauge for this garment is 24sts x 24rows over a 10cm wide/tall section "when slightly stretched".

My gauge is very different, with many more stitches fitting into the 10cm breadth, so a lot more yarn used over the distance.  It takes quite an 'assertive stretch', I suppose, to get the my stitches to match the gauge.  But I do have 25 rows in height, which is very close.  (I might look into the difference between row and stitch tension and how to influence that. Sigh.)  

I don't know why anyone would include stretching in establishing gauge.  What's 'slightly'?  A centimetre?  When it doesn't bounce back?  So you can see the hidden rib?  It seems like a terribly fuzzy thing to introduce into what's meant to be your guiding parameters.

I'll confess I didn't do a swatch, and it seems I could've done this garment in a 6.00mm or 5.5mm needle and benefited.  It's also why I went off to my oh-my-goodness-I'm-so-lucky-to-live-in-this-area local yarn store today: one more ball. (Brownie points to me for only buying what I needed.  Mind you, choosing yarn I want would require bringing a snack.)

Jul 26, 2013

D130: Second sleeve done!

That is all.

A little compensation:

Little Kimono Booties, in French.I'm thinking of making a pair of knitted slippers for Bub.  She has these great, cosy little boots, but they're a bit of a struggle to put on.  I'd like something I can chuck on her feet without the fuss, but with a bit of warmth.  I have a French version of these Baby kimono slippers, which looks rather quick & appealing.

Years ago I made a striped cushion in a Linen Stitch.  It's a lovely woven stitch, easy for anyone familiar with stocking stitch, and looks glorious with variegated yarns.  While you have to do about 130% of the rows to get the same height as regular knitting, its density pays off.  I thought I could use this stitch in a little slipper to add warm and strength.  With a firmer sole, I can more easily put some puff paint or something on a slipper sole so Bub has a little grip.


Click this picture for a tutorial I found via Pinterest
The other appeal of the kimono shoes is that, as they are knitted flat and are very simple, I suspect I could adjust the dimensions as I need, which would be necessary since I'd be using a different stitch.  Hmmm..... ponderponderponder...

Jul 24, 2013

D129: Sleeve done!

I finished the first sleeve today, with only one error. (I did the 4.5mm section two rows too long, but that's easily repeated on the other sleeve for symmetry.)

The shoulder castoff using a double-rib,
and the knit-wise castoff on the arm
In the name of Murphy's Cousin, I cast off the shoulders rib-wise, planning to manage some give in the seam and have it relax a little.  I thought, too, a ribbed cast-off might have less bulk than knitted cast-offs seem to have.  Why they should be any more, or less, bulky than a ribbed cast-off is beyond me and I'm probably wrong.  

However, I cast-off knit-wise for the arm thinking it would stretch it out and help with easing the difference.  Now I'm thinking I should've just cast-off knit-wise back at the shoulder so that I'm not dealing with a bouncy length or introducing droop in the seam - maybe it'll be harder to match with all that stretch...  Then again, maybe some bounce will allow the garment to size up in the future... 
Over thinking in much? Shyah.

I also realised today that Silly Me gave away the colour of this gift in a previous post, so thought some pics to help explain couldn't hurt.  One day I will remember all the things!

Jul 23, 2013

D128: Tip of the day - Joins in knitted cuffs

Sometimes yarns have a bulge where a ply (a little thread within the yarn) begins and ends and they've been worked together, such as with weaving or an attempt at felting.  Sometimes there's just a little knot with two little tails.  This yarn I'm currently working has given me a knot and it's landed in the cuff of a sleeve.  (These knots pretty rare:  in the two balls of yarn I have left I can't even find one to photograph for you.)

The little blighter
Initially, I wasn't fussed about it.  I planned to work it so that the tails would appear at the back of the fabric, if at all.  In fact, joining a new ball by tying the two threads at the back of the work is perfectly acceptable and has been done since time cast on.

However, there are at least two places where this shouldn't occur: the collar and the cuff.

I'm pretty sure I can still weave this little tuft into the work, but I can't be sure it won't pop out in the future.

I should have cut out the knot and rejoined the yarn at the side.  The side seam is an easier place to hide an end and this is important because cuffs (and collars) often have both sides exposed, especially in baby items where lengths are turned back for growth.  I forgot that when working on a sleeve the 'right side' really applies to the arm and shoulder part because often both sides of the cuff may be the 'right side'.

So let it be known people: if you're working on a portion that may have both sides showing during its use, keep knots out of the work by rejoining at the seams.

In other news, and for my own records, I made another fruit purée with the following stats:
6 medium/large apples, two pears & 1 banana = about 42 tbsp of purée (840ml or a bit over 3 1/3 cups)

Jul 22, 2013

Hello Forgetful Head

I just got back from visiting my friends and their gorgeous new little boy.  Their teeny weeny itty bitty human. I gave my friend the jar of little baby decoy cookies that are meant to keep the dad and kiddliwinks away from her lactation cookies.  I didn't intend for the baby ones to get so... well.. done but they're fun never the less.

My friend told me when her little boy was born that he was 3.2kg, only a little bigger than Bub's starting weight...  Where was my brain?! I know she started in 0000s and the thing I'm making IS HUUUUGE!  It will probably fit Bub better than him! I'm making the smallest size already...

Good news: I need a new woolly something for Bub and this will do nicely.  
'Bad' news: I need to choose and make something else for the new little guy.  Oh heavens, more choices, more knitting, whatever shall I do? Alas, alack, the hardships I face. 

The biggest question: do I pause this project to complete something for the new baby, or power on.  Option B I think, and it will give me more time to decide on what to make him.

Ed note: 
Actually, after measuring it against Bub, it will be a little snug for her yet she's  11mo and it's a 3-6m size.  If the Lil Guy grows as she has, it'll probably still fit him come the Autumn weather when he's 9-10mo and even in the the old cool snaps over summer.
It's meant for him so to him it shall go.  I might make the next size up for Bub later.

I should still make him something he can wear before Christmas though... Yeah. Prolly should.

Jul 20, 2013

D126: What?! And not knit?! As if.

As I mentioned earlier, one of my BFFs has had her third baby - a little boy yesterday morning.  While I've no idea how quick another baby project will be (the last one took 2 weeks) it won't stop me from beginning something for this little lad.

Bub began swimming lessons today.  It turns out she's a little elderly for her group.  At a seasoned 11 months, she's the oldest there (although by no means the hairiest - she's still a fuzzlebug on top).  It was a roaring success and we were able to stop by the yarn store on the way home, putting the whole outing under 'Winning'.


I thought having Bub & Hub waiting in the car would help me make a speedy decision.  Speedy? Yes.  Best choice? Not sure.  I'm afraid the grey I've chosen is too dark, even though I plan to decorate it with a light blue.  I can't even ask your opinion because, like I said, my friend reads here* and I'd like there to be some surprise to the gift.  (Hence the lack of pics.) Ah well, shall just have to trust he's a cooler kid than I.

In terms of the work, I'm knitting the garment as directed and not converting it to in-the-round.  Although I am using the Continental style, with circular needles, this pattern has sleeves and I don't fancy attaching set in sleeves on a knitted garment.  I'd much rather sew up the sides from cuff to waist at the end.

So, before I go wrap up the house for the evening run, here are the best bits of news for today:
  • This Debbie Bliss Cashmerino Aran is devine to work with; and
  • I began the back this afternoon and I think I'll be up to at least the armpits by bed!  Who knows where the day will take me!
*She's, like, a quarter of my readership!  Gotta look after my peeps!!

Jul 14, 2013

D124: Tip of the day - Hang your ball low!

Does your ball hang low? Well, I should, in some way or another.

While working on this garment, knitting left-handed in the Continental style I usually use with circular needles, I had patches of loose stitches.  Sometimes, this was due to dropping the tension when doing purl stitches - I'm still developing my reliability with tension when switching between stitch styles.

However, during the arms holes and neck bands I realised how this was happening.  (I knit faster than I think, it would seem...)

Here's a picture of how the tension is meant to be held when knitting Continental:
The wrapping and hold or traditional Continental knitting

This yarn is lovely and smooth.  in these winter months my fingers are slimmer, cold and smooth and the yarn just slips through like ribbon. Here's how I held it for this project:
The way I wrapped and held my yarn for this project.

And here's how those loose patches turned up:
The ravelled loop already in my hand, and what the little blighter looks like when drawn out.

As the garment is turned the yarn becomes ravelled*, sometimes into it's twist and sometimes against.  Either way, a little loop sometimes evolves and travels towards the work as I knit.  Soon, it's inside my fingers and I haven't even noticed it's there until it's too late, slackening my work - even just one or two   stitches, and developing a loose bunch of stitches.

In my hurry with this project, I haven't taken the diligence to go back, unstitching suspect bunches and reknitting them with better tension.  I also let my work space be very crowded, with bags, needles and my book, because I was keeping it from little hands.  This meant the yarn got wrapped up in things sometimes - another tension trap!

The solution is to anchor the ball of yarn somehow, and some distance and gravity would suffice.  So whether it's next to your feet or in a container, hang your ball low so that the yarn doesn't loop on itself before it gets to the thing that should control the yarn: your tension hand!

*yup, I choose to use that word this way

Baby Dunn Vest Done

Made it! Delivered and complete! Button and all :)


Pattern: Vest
Source: Debbie Bliss Baby Essentials
Yarn: Debbie Bliss Baby Cashmerino - colour 202, light blue
Needles: 3.25mm & 2.75mm

Jul 13, 2013

D121-123: Pant! Pant! Puff! Puff.... Woooow!

I finished the data work on Thursday and threw myself into this. Scrabbling around guests, errands and a baby cruising the furniture, I'm somewhat pleased with what it is so far. 


I had hoped to be doing a ridiculous late-night blocking effort with a complete vest. But, alas, there is one armhole to go. Hopefully I can have the blocking begun by the time Bub finishes her first nap.  

While I was working, I had a daydream of my friend pulling the vest out of the gift bag, dutifully complimenting me on the work, and me saying "Thanks....  pass it over and I'll sew on the button."
Wish me luck. 

Jul 5, 2013

D118: Intense knitting

A bit more done.  Hmmm... those stitches really are leaning to the right...
Another inch or so complete and a pattern has emerged...

There's a ridging in the stocking stitch.  Here's a horizontal shot that I think better reveals the tilt.
See what I mean?

I think my tension, combined with the way I pick up a stitch to knit Continental style, has helped twist the yarn in each stitch.  The right-hand needle enters the stitch at the base and as the needle slides up it pushes the wrap of the yarn upwards, unwrapping it a bit below the needle and tightening the wrap along the back of the loop and behind the left needle.  That's my theory anyway.  I haven't had this happen with my right-handed knitting style.  I think, in future projects, I'll change my yarn hold and hopefully that'll keep it from being pushed around so much.

I'm not sure I can do much about it other than easing the tension so that the entered stitch will slide around the new stitch more easily.  However, at 27sts per 10cm, it's only slightly tighter than what's prescribed by the pattern, so I'm reluctant to change that, especially this far in.  It may mean I have to go get another ball, but I could use the contrasting yarn to do the neck and arm holes... Whether I do that or not probably depends on the time of day I get to that stage: if it's after the shops close, ecru contrast it is!

Anyway, at this stage, I'm happy to let it be an aspect of an individual garment.  Worse things have happened, right?

Jul 3, 2013

D116: While she napped

A few more rows completed.  I'm using a single-stitch cable to indicate the side seam.  It's my compromise between adding a purl stitch (which would be fine) and they way the seam tends to be reinforced when sewn.

I'm glad to be working it this way, actually, because when I sew seams the vertical give at the seam is less than in the body and the way it drops over time is different.

Must go get some laptop work done so I don't feel guilty when I have another go at this tomorrow! :)