Showing posts with label complete. Show all posts

Aug 17, 2014

D322: Ah! Bees!!

There's a buzz, buzz, buzz at the partyyyy...

So I committed to making our new little 2-year old a cake she would recognise and enjoy.  She loves Buzzbee and I'm very glad I chose this option.  It's a character that doesn't change much and I can't very a lot.  He has very few features and only two colours, and is based on a simple shape common to cakes.  He doesn't even have limbs.  Why I deliberated for so long over other options is a mystery.

After watching lots of YouTube videos of people making buttercream, and colouring, rolling and laying down fondant, I decided to dive in.

Two 12" cakes layered with bought ganache.

The cake is one I've previously used and quite like.  Well, love, actually - it's so quick!  I made up a chocolate variation for this cake.
Take one Nigella Lawson Awesome Vanilla Cake recipe; add 3 tbsp of cocoa to the dry ingredients and 1 tspn of instant coffee, dissolved in just enough water, to the liquids.
I used a lined 12" round tin and baked it at 350F for 50-55mins.  See the lighter spots on the top? It's done when those finally appear in the centre.

So I baked one cake during nap, had a shop (of course!) and then baked the second before dinner.

The face was put down first, on a thin layer of buttercream icing.
The features were placed on top afterward.
I did all the decorating and arranging after dinner, which took about 4 hours.

I prepared the buttercream first (a double helping: 800g pure icing sugar to 250g of whipped butter), but didn't colour it.
Then I put the buttercream aside and tackled the construction.

I put down a thin layer of buttercream to help the cake stick to the board, and placed the first cake down.  I took about half a cm off the top of this bottom layer to level it a little.  To flatten it completely would've taken a third of the bulk, which felt like a terrible waste, even though my hovering Hub and MIL felt it would've been very, very worthwhile.  So, while the bottom layer wasn't completely flat, the 500g of ganache did a great job levelling the difference between the layers, and the bottom of the upper layer barely curved at all.

I decided to do the face next, while my brain was still pretty good.  This face used about 750g of fondant and I used gel food colouring for both the fondant and the buttercream.

My post from a few days ago shows the templates I used for this cake.  They were made with a dinner plate for the face and some food containers for the eyes.  I used a Math-o-mat and trial-and-error for the mouth.

I also made a strip of paper that fits inside the top half of the face to help place the eyes.  The strip was a wide as the distance from the edge to the eye (about 15mm) and marked where the top of the eyes should align.

With the yellow band of 'fuzz' on the base.  I patted it with the prongs of a fork
to make it look fuzzy.   The fondant yellow is a richer colour than the bright stripe.

With the black buttercream.  Look at the widdle hand...
I wish I'd made the face features much thinner, instead of the 1/4" of the face.

I asked Hub to stay up with me by this stage, for company and moral support.  He was the one who looked up how to adhere fondant to fondant: with a paste made from melting a bit of fondant in hot water.


Making the black was so much fun.  Doing the two yellows was a careful task, adding a little bit at a time. (Two dips of Lemon yellow plus a little dab of Tulip red.) But with the black... well, you can hardly make it too dark.  That was fun.

The hands and feet were cut without a template.  I flipped the first hand and made the second by cutting around that; ditto with the feet.  I also chickened out of fingers, which Buzzbee normally has.  Midnight brain said no.

...and the widdle feet. 
Hard to see, but the hand on the right side is waving.
We added the antennae on the day - just some 12mm x 30cm black pipe-cleaners curled as you like, stuck into the ganache layer at an angle.

On Sunday morning Bub saw the cake in the kitchen and exclaimed "Wow! Big cake! That's amazing!"  It was a success already!

Aug 2, 2014

D319: complete - Junebug Dress

It's done!


I took an inch off the hem and turned it up 1" then 1.5". I'm thinking of adding a red ribbon near the hem too, but undecided... Still, pretty happy with it!

Pattern: Junebug dress by Jess at her blog Craftiness is Not Optional http://www.craftinessisnotoptional.com/category/junebug-dress 
Fabric: A walk in the dark woods by Zesti, via Spoonflower on poplin http://www.spoonflower.com/fabric/382063

May 11, 2014

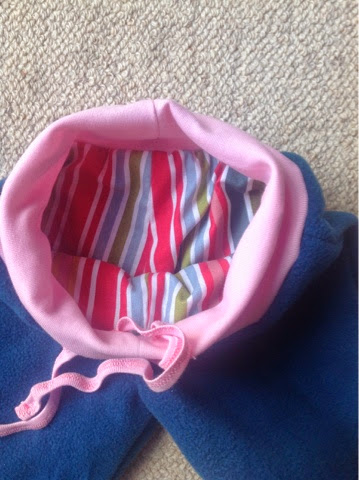
D268&288-91: Toddler pants completed!

Blogging is taking more and more of a backseat to making these days.  I'm not sure it's a bad thing but I will continue to at least photo-journal what I do, if only for myself.


There were a lot of days and steps for this and I kind of learned a lot doing this project.

I know I used a different fabric in the main pieces, and lining, so I think these turned out ok all things considered. I think it would fit better without the lining but I'm still learning how to work with stretch fabric on my regular machine.

I actually used the balance function on the machine!  This is the honeycomb stitch without the balance changed on the left, and then I turned it up after a few cm. 


The waist tie (above): I did not do a good job of this.  I'm not sure I would do this technique again. I just couldn't seem to get something so narrow through the feed without any stretching (which equals curling, even after pressing).  Maybe a walking foot?

The lining. I'd add a cm of length to this coz I wanted to cover the seam there with some hand sewing.  It wouldn't reach as it was.  Maybe a different kind of fabric would work better, but I'm not sure I'd be interested in substituting anything other than a flannel or stretch cotton for this cotton, which is kinds the same...


I'm still learning which stitches are best for what situation. Even though Bernina have helpfully provided a page describing all the practical stitches' uses, there seems to be so much overlap across them... I need a reference guide or something that shows the ideal situation for each stitch.

So when I say I 'kind of learned' stuff, I feel like I learned what not to do but I'm not too confident about what to really do instead. All the same, these I will be warm pants that will fit Bub, maybe in about two months (?) but certainly for a long time. :)

Apr 14, 2014

D272-78: Oh my goodness - it's done!


Long story short: the house had been sick, with Hub home since Tuesday and Bub coughing and gooping everywhere.  But in the midst of that I took quiet moments for this quilt, and all of a sudden I could see the end!  Blogging took a back-seat to quilting (as it should really).  Here's how it went, in pictures...


My thread choices for the top quilting

All the zigzag quilting complete, with the sashes to be quilted.
My idea for feeding the bias tape to the sewing.
The detail of the quilting at the corners.
The whole thing, getting an airing in the sun.
You've no idea how paranoid I was about birds flying over.
Plus some other things I did in between sewing, which require less attention and are more interruptible :)

Children's clothing patterns; ideas for the next quilt.

Dec 31, 2013

Complete: Bench seat cushions


These cushions were made with 5cm thick foam from Clark Rubber.  I used medium density foam, which is not the longest life span but is firmer.  Each cushion was 49.5cm wide x 55cm deep and cut in the shop.  

Each cushion was covered in a close-fitting calico cover that was hand stitched shut.  The cushion cover fabric was from Spotlight.  It's a furnishing fabric, in a cream bone colour, with a long spacious gumleaf matelassé pattern.


Sep 22, 2013

D169-71: Complete - Sashes

All done!


I'm not sure about the curve. I think it would look better if it were less curved, and the width tapered more directly to the base of the loop. But they're done now, so it's all moot.  I do like the top set though :)


Sep 15, 2013

D162-4: Cushion covers

My MIL ordered some Spoonflower fabrics some time ago.  They were destined to become cushion covers in the living room of their new home.

Love birds - twilight pallet by Patty Sloniger
and The Chaffinch by Ewa Bursztyka
Well I finally got them done!  


Thank goodness it was in time for her birthday.  Unfortunately, she was under the impression that they would be her birthday gift, which I didn't recall, so hopefully she wasn't too deflated when they weren't in the wrapped parcel.  Ugh! 

The left over fabric is going towards some curtain sash tie backs. 

I'm playing with some ideas from what remains after that.  Seems a shame to waste any of it...

Aug 24, 2013

How to: Personalised Bunting!

I decided to make a birthday bunting for my daughter for her first birthday. Hopefully it'll last for many birthdays to come.


Without a pattern here's how we went about it.  This a long post and includes how I did this bunting, plus instructions for variations.

1. Chose a font


Tip: Keep it simple and sans serif. That is, pick one without tails on the letters, like Arial.  There are a lot of corners and extra bits in fonts like Georgia or Courier.)

On the computer, we used 100% zoom on the screen to view the letters, then folded some paper to an equivalent size and held it up to the wall to see how big it would feel.  Our letters are about 8cm wide and 12cm tall (about 3" x 5").

What to print
I chose to print "HAPPY BIRTHDAY KATE!" because the exclamation mark gave me letter groups of 5, 8 and 5 - nice and symmetrical.

All the letters were printed and cut out.

Reinforce skinny corners with tape. Label your vague letters.

2. Decided on a triangle size


The triangles don't have to be equilateral (sides all being the same length); they can be isosceles (two sides the same length). (Really, they can be square if you like - it's your bunting!)

Our triangles are 20cm wide and 25cm tall (26cm sides).

3. Made a template.


I wanted variety in my bunting, not uniformity.

Uniformity across the front and back of a bunting shows up most with linear patterns, so the template and fabric needs planning to achieve this.

For uniformity with patterns that run in several directions, make a diamond shaped template and align the pattern along the length.
For uniformity with patterns that run only one direction (such as words you'd like to be read from both sides), cut out two triangles, remembering to add any seam allowance.  Align the pattern with the top of your triangle.

If uniformity is unimportant, I recommend a kite shape because it has only one side seam to sew.
Mark your grain to run down the centre of the front triangle.

Remember to add a seam allowance around all the cutting edges.

A step I did later, but should be done now: Mark the space for the letters.  See Step 8 for a picture.
Left: The original template. Right: The kite-shaped template for cutting

4. Bought (more) fabric


When buying the fabric, you need to decide which way you want the pattern to hang and make sure you get enough fabric to fit as many templates as you want.

I wanted a lot of different bright colours and chose three patterns each of blue, green, red, pink, purple, orange and yellow - 21 colours.  My rule for this fabric that the patterns be one colour, maybe with some white.

A fat quarter gave me two kite shapes on the grain, rotated 90° (42 flags). This meant that I was sure to have my patterns varied between flags and across the front and back.

Trace the letters back-to-front
You will also need fabric & stiff interfacing for the letters. I used between 50-100cm of interfacing and two different white-patterned fat quarters.

5. Made the letters


I cut out the printed letters and traced them back-to-front onto interfacing.
I cut the interfacing into a convenient shape that evenly divided the letters into two lots, one for each white-patterned fabric.
Then I attached the interfacing to the fabric.

Once they were securely adhered, I cut out the letters along the traced lines.

Don't cut out the traced letters before you iron them - that's too much work!

6. Cut out the flags


Remember to arrange your template carefully if you care about the pattern directions.  Otherwise it's just important to align the grain with the length or top of a triangle so that it doesn't warp upon hanging or stretch when attached to the bias tape.
I recommend using a rotary cutter and, depending on how long your bunting will be, this would probably justify getting a cutter & mat if you're without.

If you are doing diamonds that will be flopped over the bias strip (one long seam, nice and easy) you might like to use pinking sheers or a decorative rotary blade to make the edges more interesting.

7. Arranged the colour order

To do this I arranged my fabrics in a colour wheel and collected them in a sort of skipping phrase - next colour, skip a colour, next colour, skip two colours, next colour, skip a colour, etc - to create variety.
Then I swapped fabrics so that stripy patterns were separated and so that there was no repetition in the sequence.
There's something soothing & satisfying about rainbows...

8. Placed the letters


I 'matched the middles'.  That is, I found the centre of the colour sequence and the centre of the words and pinned the letters (just one pin at this point) to their matching flags.
Then I laid out the whole thing to check the spelling and see the colour groupings.  I did a bit more shuffling so I was happy with the colours, although it meant the stronger, bolder colours (my favourites) were used for the words and the weaker ones ends up in the ends.
I used the template to centre the letters on each flag and carefully pinned their parts so that they wouldn't shift during sewing.
Using the template to mark the centre-top of each letter.

9. Sew the letters


I like to put my start/end point in an inside corner, should I have one.
For example, I began the A in the corner of the bar as you can see in the photos below.

I used a zigzag set on 3.5 wide and <0.5 long. (The stitch length was rotated off zero about a quarter turn.)

To create square corners on zigzag edgings
  1. Sew begond the end of the edge for about 2mm (no more than the width of your zigzag). 
  2. Lower the needle to the outside of the turn.  If it's turning left, lower it in the right; if it's turning right, lower it into the left.
  3. Raise the foot and rotate your fabric.
  4. Lower the foot and resume sewing.
This creates a square corner on your sewing line rather than a dint. (See the H in the third photo below.)

Stitched beyond the edge;
the needle lowered on the right, ready to turn to the left.
The needled lowered on the left; foot raised and fabric turned.
Some finished letters. I began with some nice easy ones - K, A, T & E!

10. Sewed the sides of the flags


You don't need to do this step if you've cut diamonds and plan to flop them over the bias strip.

For both two-triangle flags and kite shapes: Sew the side(s) of your flag with right sides facing (inside out).

Regardless of how you aligned your grain, be mindful to not stretch the edge when sewing.


11. Trimmed and pressed the flags


For kite shapes:  Trim the tips by snipping a long triangle off the end.  It doesn't need to be right up against the point, you just need to remove the bulk from the tip for turning out.

For two-triangle flags:  Carefully trim on both seam edges.

For trimming that was too close: A stop-fray liquid, or even a dab of glue, can help keep fraying at bay.  Apply this when the flag is inside out.

Turn out your flag and use something pointy to push out the tips.

Press your flag so that it lies symmetrically and flat.

For diamond shapes that will be hung over the bias strip:  Fold and press your diamonds in half with wrong sides together.  This step is important if your fold is not on the grain (maybe for pattern reasons) because it will help prevent stretching.

12. Prepared the bias tape


I used two packs of 5m x 12mm white bias tape.  It comes with the raw edges folded over and pressed.

To join two lengths of bias tape
  1. Open out the ends of the two strips of bias tape and press flat.
  2. Cross the ends so that they are perpendicular (90º to each other - one up/down, the other left-right).
  3. Sew across the widest part of that overlap.  Your sewing line should go through the two points where the fold lines cross and should be at 45º to the edges.
  4. Trim off excess tape.
  5. Press open the allowance and re-press the folds.
My apologies for not providing pictures.  This site does a nice job and begins with making your own bias tape.

Diagram
From http://www.sew4home.com/tips-resources/sewing-tips-tricks/bias-tape-how-make-it-attach-it

13. Attached flags to bias tape


I began attaching my flags from the middle of the tape, starting with the middle of the words (between the T and H of birthday) and worked my way towards the start and then in the other direction, towards the end. This way, I knew the flags would be centred and I'd use the tape economically.
The middle of the tape was already marked by the join I'd made in Step 12.
It was also easier to seal the ends of tape as a finishing step rather than at the start.

For made flags:  Fold your bias tape in half, length wise.  Tuck the top of the flag into the fold of the bias tape.  Use a pin, if you like, to hold the start in place.  Sew along the length of the tape at an appropriate width.  For a 12mm bias tape, it's about 4-5mm from the fold, which should collect the back of the tape too.

For diamonds: (I would recommend pressing your bias tape in half, the way it will be sewn, so that it doesn't push itself out of the flag fold as you sew.)
Fold over your bias tape and tuck it into the fold of the diamond. Sew along the fold, catching the bias tape in the stitch.  The colour of the bias tape will be hidden.

How you space the flags is up to you.  I intended to put a bit of space between the words, but realised I wasn't sure of how much tape I had spare at the ends.  It's not that important with familiar phrases like 'Happy Birthday', though.
A gap of about 1cm to half an inch is sufficient.
I thought that if the flags were very close the bunting might become stiff and not drape easily.

14. Admire work
Check the back of your flags to see that both sides of the tape were stitched.  Re-do any sections that need to to avoid wear and tear from catching.  Use a needle to hide thread ends in the bias tape.

Hang your bunting somewhere obvious and remember to take a photo of it in action!

Aug 4, 2013

D137: Complete - Harrison's Shawl Collar Sweater

I finished the jumper for my lovely friend's gorgeous baby.  Unfortunately I have a cold this weekend.  It hasn't hit me very hard but I've no intention of inflicting it on my friends and their children (who knows what it might morph into for them) so at home I shall stay.

I'm sure the colour on these is off.  The decorative yarn is a light blue and the main yarn is a lovely warm charcoal.

Imagine a slighter lighter blue than the border...


Jul 14, 2013

Baby Dunn Vest Done

Made it! Delivered and complete! Button and all :)


Pattern: Vest
Source: Debbie Bliss Baby Essentials
Yarn: Debbie Bliss Baby Cashmerino - colour 202, light blue
Needles: 3.25mm & 2.75mm

May 27, 2013

D105: Finally!

I finally got the photos printed and into the cubes!
Uh mah gerd I was so slow at doing that.
Tomorrow's job is mailing it off!

I am very pleased with the result though! :)

Mar 15, 2013

D67: Another bag

Not the most perfect stitching by far, but neat enough for today :)


Mar 12, 2013

Sa-shay!

Bub, delighted to be here today!

From the 2013 summer range, modelled here by Miss Bub Spy, we have the Angel top...

The floral blue and its reverse
The red cross-stitch print...
... and the green Japanese print on the reverse.

Here is the drafting of the pattern, the making, and here are some close-ups of the finished product.

Jan 30, 2013

Photo cube project: Done!

Done diddly dun-done!

The six different cubes

Below: Top and bottom rows are the feature fabrics; middle rows are the two sides.


Knock 'em down! KNOCK 'EM DOWN!!