Showing posts with label pattern. Show all posts

Jul 12, 2014

D312-3: Regulating my stitches!

I've spent these days getting used to the BSR (Bernina stitch regulator) attachment.  It's a foot with a mouse device built in, which detects how fast you are moving your fabric and adjusts the speed so that stitches are the same length.
There are two modes: 1 is stitch while the sewing pedal/button is pressed, 2 is stitch only when the fabric moves.  You can also detach the cord and use it as a regular darning foot.

Read these from right to left...

At least I got better...

Most recent effort, with notes
The notes show the BSR mode and stitch length, and then the last one was using the foot as a darning foot (detached BSR cord, feed dog dropped, regular straight stitch, length 3.0 I think).  The lines are where the lower thread has been pulled up to the surface.

I have a set of long margins and borders to quilt, and I thought this design would be a good beginner pattern.  This one below is also terribly pretty, very complimentary to the quilt, and I think it will cope with 'close enough for a beginning' quite well ;)

From Christina at A Few Scraps
 
There's no point me considering any of them, though, if I can't get my curves smooth.  And I've only been practising on a square foot of space - nice and light and easy to move - how am I going to go with a single-bed sized pieces! :S

The thread pulling seems to be a common problem with quilting.  I imagine it means I need to go slower around the corners.  It may also be that my upper tension is too high, but its' only at 4, so I'm not too sure about that...  I will be quilting this pattern on the back of the quilt though, so I'm not very worried about it because the stitches look fine on the front.

The reason I'm quilting "upside-down" for this part is that I need to draw the pattern onto the fabric.  However, I don't really have any spare fabric from the front design, so I can't test the pen and see how well it disappears.  Rather than take the risk, I'll draw it on the back, where I already know it will fade thanks to my practise pieces.  I can also manage the bulk I'm getting with the backing fabric having a lot of stretch.

Can I also add how rubbish it is to be sick?  It's only a passing sickness, but it's still no fun.  I have a terrible cold, just short of a flu.  My head is well full of clay, with achy teeth, cracked lips, watery eyes and a crackly chest.  I even have acne.  You know it's bad when your body tries to push it out via your skin. :(  I had gastro just a fortnight ago too.  Both these illnesses came via Bub and she coped with them well.  Her gastro was rubbish for a day, and the cold presented as three days of croup plus a few of misery, but my body's taken them on with full nerdy force and done both bugs with a thoroughness any librarian would envy.  Maybe that's why my blogging and craft have been so slack.  Anything I can't accomplish in front of the telly is a big deal at the mo.  Please get better body, for the start of term three!  I want to want to do things again!

Oct 12, 2013

How to: No-Sew Wet Weather Gear in 10 Steps


Want to get out in the wet weather but haven't a coat or boots for your Little One? Do you have a few meters of waterproof fabric, or even a big garbage bag? DON'T WE ALL??! Well, guess what? Freed from the house you shall be!

This project makes a poncho, a rain bonnet and 'shoe cover' booties that give good* cover in rainy weather.
(The photos are of the prototype, before trimming.  The final product was a lot less of a trip hazard.)

You will need

  • A child, wearing their outdoor clothes and shoes 
  • About 1.5m of a waterproof fabric.  A cut open garbage bag may work, but I haven't tried it (yet).
  • Elastic - about 40cm
  • Sticky Velcro dots - 4 pairs
  • Scissors
  • Wide sticky tape of gaffer tape, or a sewing machine if you're able
  • Measuring tape, or string to collect lengths

Priorities for this project, from highest to lowest: safety, speed, accuracy, looks.


PONCHO


1. Get two measurements.
A = child's shoulder to knee x2
B = child's wrist to wrist, +10cm (4")
Cut out a rectangle that is A x B for your baby's poncho.  If A or B is close to the width of your fabric, use that width.  

2. Fold the poncho in half twice, with the back of the fabric showing (so half one way, right sides facing, then half the other way).  You should have a corner that's all fold, and no edge.

3. Measure across the top of your child's head.
If you can find something round that's as big as your child's head, use that to trace a quarter circle on the fold-corner.

Otherwise: Halve that amount.  Measure that amount down the edges from the corner and mark.  (So, if it's about 16cm across the child's head, measure 8cm down each side.) 
Cut straight across from one mark to the other, or if you like it fancy, draw in a bit of a curve to cut along.

3. Open poncho.  
Decide which straight edge is the front.  
Make a 5cm-ish snip from the neck hole pointing straight down the front.

Neck cinching dots.

4. Put poncho on child.
Take a pair of Velcro dots and join them together (i.e. 'Do them up') so you have them connected and with their stickiness exposed. 

At the neck opening, next to the top of the snip, stick your Velco to the inside of a corner.  Then take that corner towards the child's opposite shoulder to close the neck opening and make it fit better.  
Attach the Velcro dot wherever it fits best.

Wrist cinching spots.

PONCHO CUFFS


5. Take one side edge of the poncho.
Find the middle point and hang it over the child's wrist.
Like before, connect two Velcro dots with their stickiness exposed and attached them to the poncho under your child's wrist.
Do the same for the other side edge.

Optional step: trim the corners off your poncho, however you like.

BOOTIES (shoe covers)


6. Get two bootie measurements with shoes on.
A = ankle to ankle, going under the foot + 10cm
B = front of ankle to top of heel, going under the foot + 10cm
Cut two rectangles that are about A x B.

7. Tie some elastic around the child's ankle so that it's snug, but not tight.  
Check you can take the elastic off before you tighten the knot or trim the elastic.  
Make two loops this size.

To put on booties, take the short edge of the rectangle and hold it under the ankle.  Wrap the length of the plastic under the shoe and over the foot and hold in place.  Hook the elastic over the toe and drag it up the back of the heel, collecting the sides of the plastic.  Vwa la!

BONNET


8. Get two bonnet measurements 
A = shoulder to shoulder (bottom of the neck), over the head
B = from eyebrow to back of head (the crown)
Cut one rectangle that's about A x B. 

9. To construct bonnet
With tape: Fold in half, wrong sides facing, so that you have two A edges folded in half.  Hold one edge closed and open the other so you can see the inside of the closed edges. Overlap the closed edges and tape them down.
With sewing machine: Fold in half, right sides facing, so that you have two A edges folded in half. Sew down one folded A. Turn out.

Poncho too big, bonnet too small. Perfect prototype.

10. Put the bonnet on your child with the seam going down the back of their head.  Bring corners under their chin and attach some Velcro spots to hold in place.

Dress your poor child in their travesty of an outfit and admire your work.  Takes a few pics before you head out or Child rips it off.

Go and enjoy your day of floating paper boats down the gutters, searching for pearly spiderwebs, or poking earwigs under bark.

Some children don't like wearing rain bonnets.

*Better than good: good enough.

Oct 3, 2013

Pattern: Linen-stitch Kimono Booties

These booties are modelled on Chaussons mignons by Pruline (Ravelry link).  They should fit an 11cm foot, which is 9-months-old for my small baby.
You may make the sole as long as needed for your baby and, at the sides, cast on about 3 stitches for every cm of sole.


Linen stitch kimono booties

A tunnel shank button
Linen stitch is a woven stockingette stitch. The weaving is formed by slipping every other stitch with the yarn in front of the work. It is usually done with a two-row phrase of slipping every second stitch in one row and every first stitch in the other.

Needs

  • Two small buttons, preferably tunnel shank
  • About 80cm of matching thin elastic. 
  • 3.75mm needles
  • 50g Aran yarn (10ply). The example uses Debbie Bliss Aran Cashmerino in grey (colour way 28).

Tension

12st x 43rows = 4cm

Abbreviations 

CO = cast on
K = knit
P = purl
sl1p = slip 1 purlwise
st = stitches
yb = take yarn to the back of the work (away from you)
yf = bring yarn to the front of the work, between you and the work.

Bootie body 

Sole

CO 15 st (leave a long tail for construction)
Row 1: *P1, yb, sl1p, yf* - repeat ** to last stitch, P1
Row 2: K2, *yf, sl1p, yb, k1* - repeat ** to last stitch, K1
Repeat these rows (linen-stitch) till work measures 10cm (4" - approx 42 rows), finish with a knit row.

Sides

Next row: turn, extend work by CO 30 st purl wise. Do not turn - work these stitches as normal as follows: P1, * yb, sl1p, yf, P1* - repeat ** to end.(45 sts)
Next row: turn, CO 30 st knit wise, then, without turning, work these stitches as normal as follows: K1, *K1, yf, sl1p, yb,*, repeat ** to last two stitches, K2 (75 sts)
Continue in linen stitch until new section measures 5cm (2" - approx. 25 rows) (or as long as your original cast on is wide). 
Finish with a knit row and cast off as follows:
P1, *yb, sl1p, pass first stitch over slipped stitch to cast-off 1, yf, P1, cast off 1* - repeat ** to end.
Bind off with a long tail for construction. 

To make up:

Hold your work so it looks like a T, purl stitches facing up (linen pattern down). The up-down part is the sole, with a bar across the top being the back and sides. The instructions describe making up each bootie as though it's facing you, with the toe pointing towards you and the heel away.

Baby's Left bootie

Take the left arm of the bar and fold it so that its short edge matches the end edge of the stem (the toe). Fold the right arm over to sit on top of them. Match the length of the toe edge and the corners. Whip stitch from left to right (big toe to little toe) through the three layers, continuing down the right side. Whip stitch down the left side (from big toe to heel). 

Baby's Right bootie

Arrange as for the left bootie but overlap the bar arms left-over-right, stitching from right to left and down the left side, and then stitching the right side. 

Both booties

Count 18 stitches from the toe on the upper layer of the bootie and flag this stitch with a safety pin. Count 40 more stitches, along the back if the bootie, and flag this stitch too.
Take one end of your elastic and tie it to your button.  Use a yarn needle to thread the other end through the hem, beginning at the one marker and finishing at the other. The elastic in these booties is threaded through the edge for the first and last 8 stitches, but through the purl stitches below the edge around the heel, to pull the bootie up the back of the foot. 

Tie a knot where the elastic exits the hem. Make a loop, using about 1cm of elastic, by tying the end in a grannie knot behind this first knot. 

Thread the ends of the elastic into the inner sides using the purl loops inside the bootie.

Mar 9, 2013

D62: Drafting

[Eek! Wrote this yesterday, forgot I didn't press publish!]


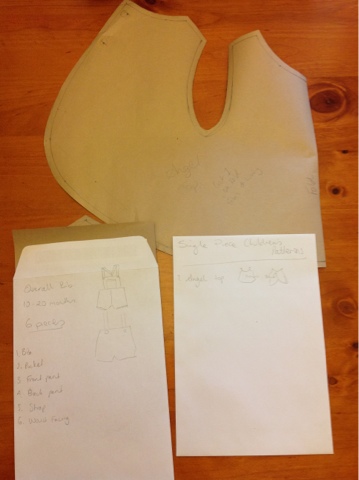
I'm really pleased with the way these two turned out.  I really liked the mild challenge these presented, just right for a sleep deprived person who needed an achievable challenge.  I'm also very glad I have an imperial-unit cutting ruler to square it all out.  I'm not sure how clear I am on the shorts' construction ("5. The straps are made, crossed at the back and stitched together." At the cross over? What?) but figure it'll work out in the end.
The boy's pants, drafted


We generally use fabric nappies (modern cloth nappies) so don't usually have a need for little pants such as the ones with the Angle Suit. However, I should probably make up the pattern just in case as we do have the odd disposable nappy outing and something as a cover would be good for the hot weather.


The Angel Suit top and pattern packets

My fabrics are in the wash as we speak, so I'll focus on the bags and some baking (I hope) before I get around to making anything with the blue floral.